Note: You will need a DD-WRT firmware that can run the latest VPN configurations and has a minimum of 8 MB of RAM/Flash storage.
Step 1 – Arresti Configuration Files
To set up Arresti VPN on your DD-WRT router, you will first need to download the OpenVPN configuration files once you’ve logged in to the Arresti website. This will allow you to connect to the VPN servers. Follow these instructions to configure your router with OpenVPN.
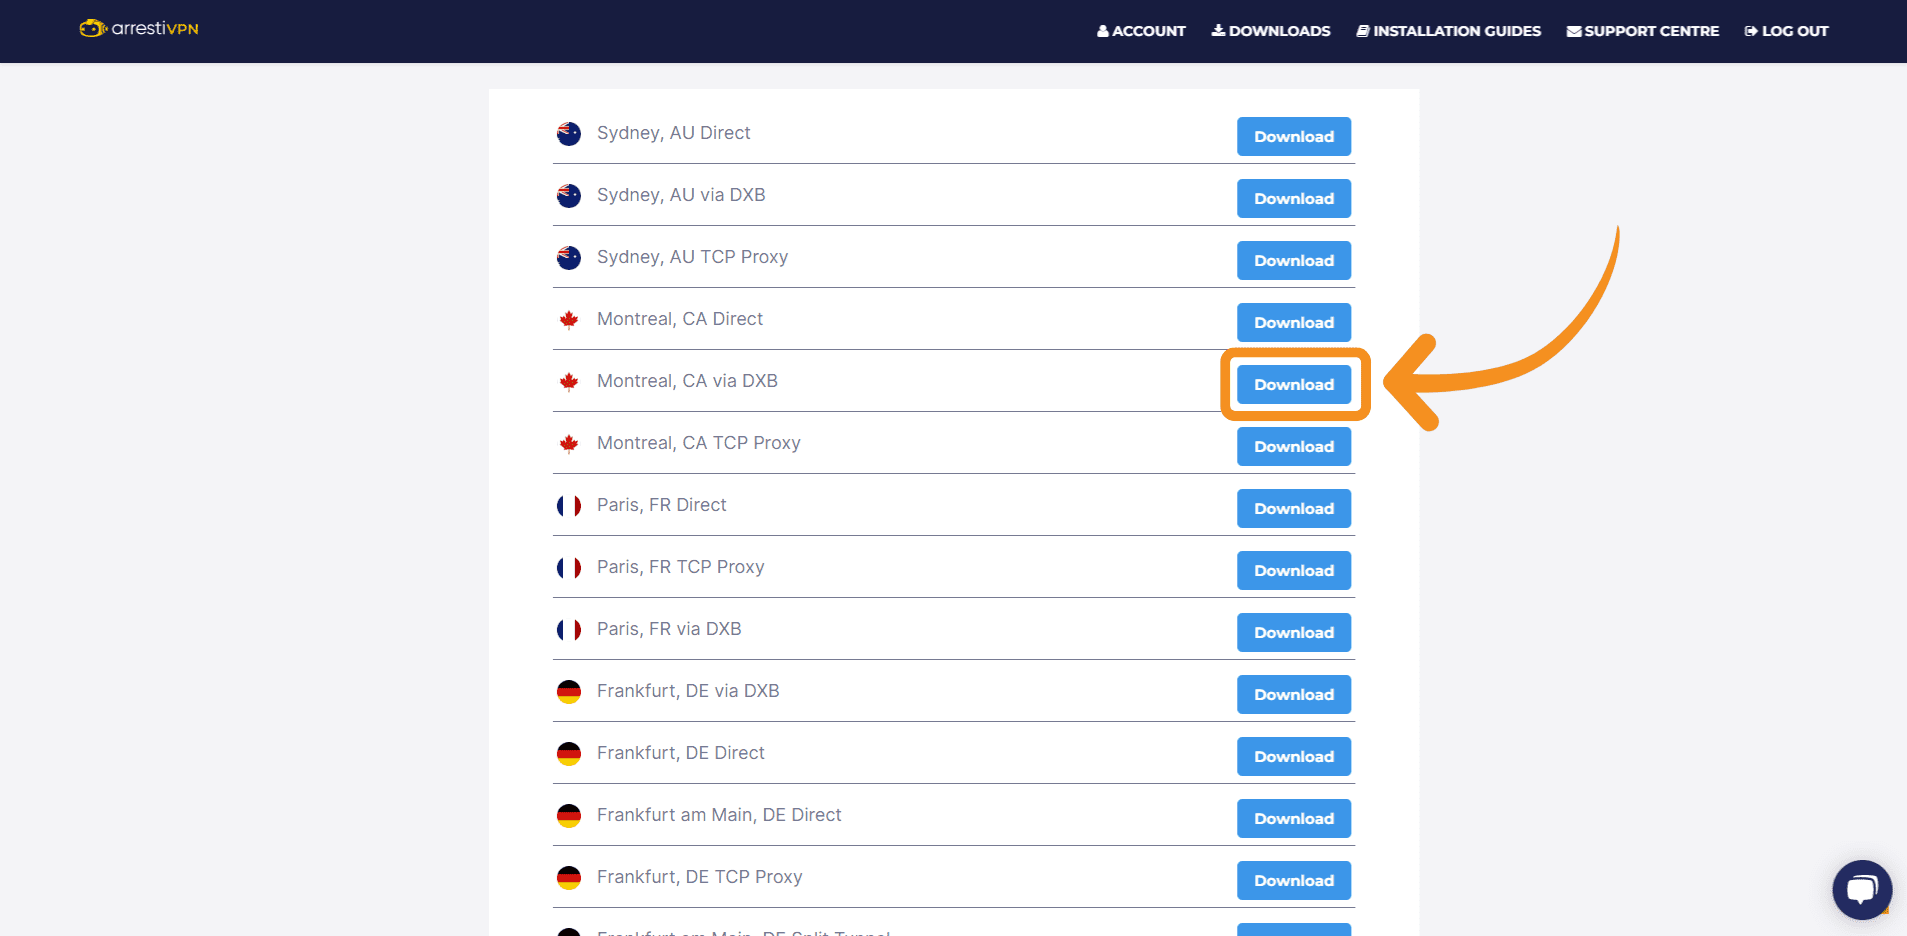
The latest Arresti configuration files can be found on the downloads page on our website: Arresti VPN – Downloads. Select “Download” to download your desired configuration files.
Step 2 – Configure The Router
In your browser’s address bar, enter the IP address for the router admin panel. By default, this is 192.168.0.1. (If your router’s IP address was changed in the past, and you cannot remember it, you can find it in your device’s settings.)
Log in with your router’s username and password. (By default, both are admin.)
At the top of the page, click the Services tab, then click the VPN sub-tab.
Under OpenVPN Client, enable the Start OpenVPN Client option. This will reveal the OpenVPN configuration panel.
The next steps may vary depending on the version of your DD-WRT firmware. Please refer to the section appropriate to your DD-WRT version.
For versions of DD-WRT with User Pass Authentication:
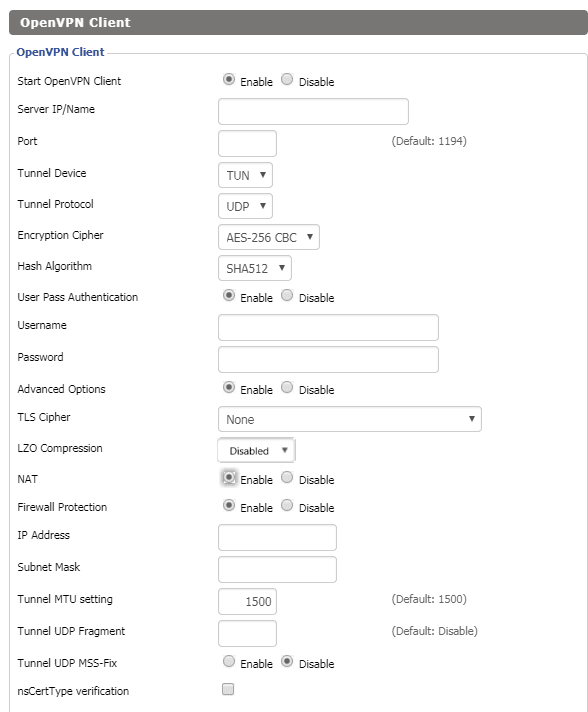
If your DD-WRT firmware has User Pass Authentication, your screen should look like the interface in these steps below. Enter the following information:
Server IP/Name: To get your server IP/name, right-click the .ovpn config file and open it with any text editor. You will see the server address listed between the word “remote” and the 4-digit port number. Copy and paste the server address into this field.
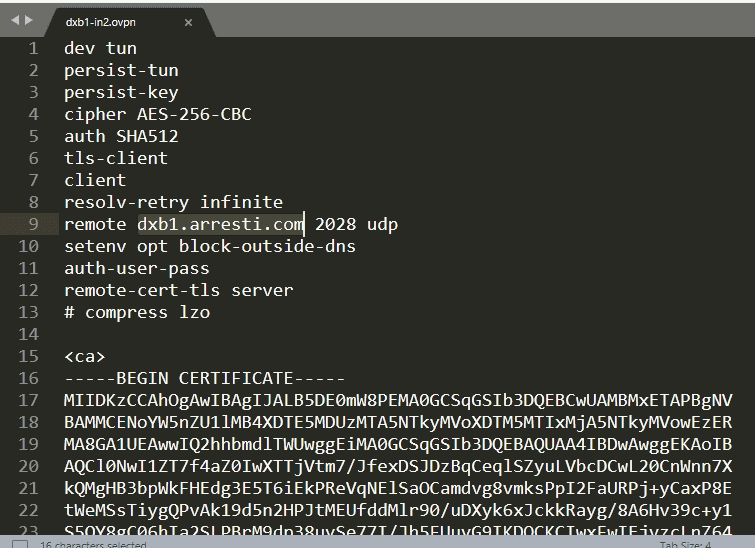
- Port: Enter the number after the server IP/name in the .ovpn file.
- Tunnel Device: Select TUN.
- Tunnel Protocol: Select UDP.
- Encryption Cipher: Select AES-256 CBC.
- Hash Algorithm: Select SHA512.
- User Pass Authentication: Select Enable.
- Username: Enter your username
- Password: Enter your password
- Advanced Options: Select Enable.
- TLS Cipher: Select None.
- LZO Compression: Select None
- NAT: Select Enable.
- Tunnel UDP MSS-Fix: Select Enable.
- nsCertType verification: Uncheck the box.
*Note if the Username and Password fields are missing, go to Administration > Commands and enter this code:
echo “YOURUSERNAME YOURPASSWORD” > /tmp/openvpncl/user.conf
/usr/bin/killall openvpn
/usr/sbin/openvpn –config /tmp/openvpncl/openvpn.conf –route-up /tmp/openvpncl/route-up.sh –down-pre /tmp/openvpncl/route-down.sh –daemon
Step 3 – Configure Arresti VPN Keys & Certificates
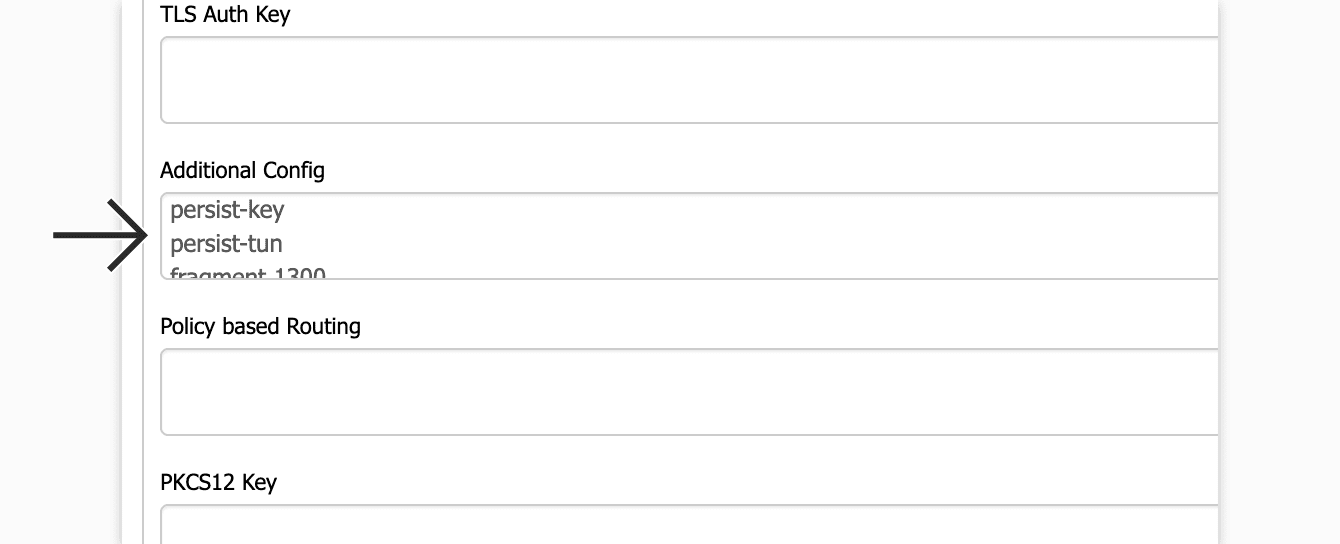
In the Additional Config field, enter the following:
persist-key
persist-tun
remote-cert-tls server
#Delete `#` in the line below if your router does not have credentials fields and you followed the step above
#auth-user-pass /tmp/openvpncl/user.conf
Enter information in the Additional Config field.
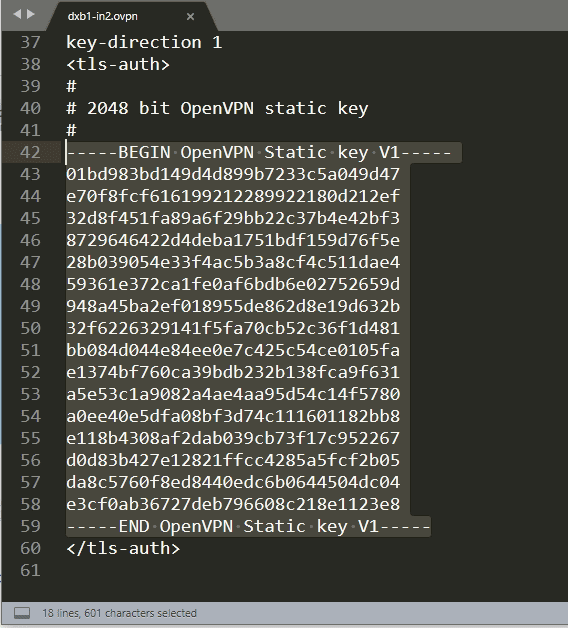
In the TLS Auth Key field, copy the text between <tls-auth> and </tls-auth> tags in the .ovpn file and paste it in this field.
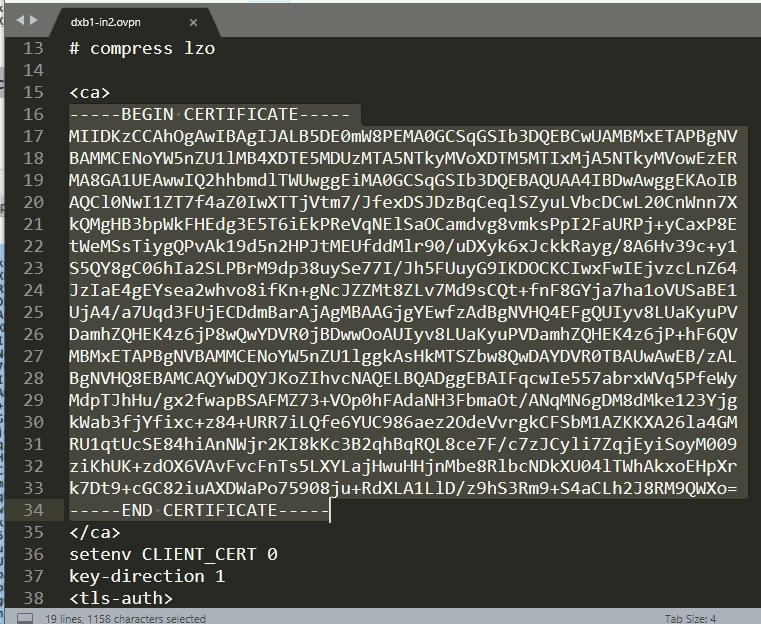
In the CA Cert field, copy the text in between <ca> and </ca> tags in the .ovpn file and paste it in this field.
Click Save, and then click Apply settings to start the connection to the VPN.
Step 4 – Verify Connection Status
In your dd-wrt control panel, go to Status > OpenVPN. If your VPN connection is successful, you should see the words “CONNECTED SUCCESS” and the following:
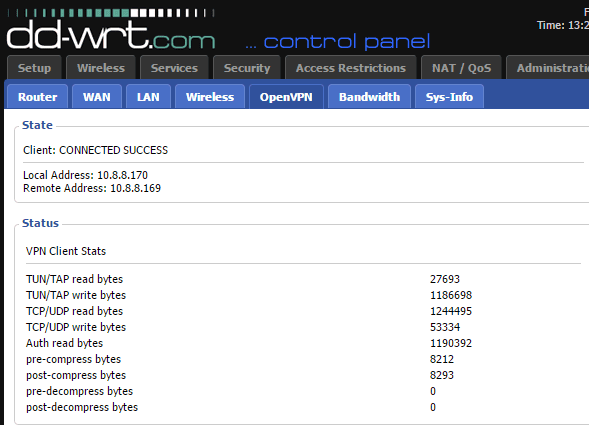
Your OpenVPN connection is successful.
